You will need paper, scissors, pencil, 2 items to draw around for the dougnut and inner circle (or a compass) felt, thread, needle, pins, sewing machine (optional) and beads.
For the dougnut template find something round thats the size you want your dougnut to be (or use a compass) and draw round it twice and cut out so you have two circles. My larger doughnuts are about 9.5cm across.
To find the centre, (if you've used a compass you will have the centre already) take one of the templates and fold in half, then half again. Unfold and where the folds cross this is the centre. Find something small to draw round the centre of the circle and cut out the hole. Using a compass will be more accurate. You now have the template for your doughnut.
To make the icing template, place your doughnut template over the blank circle and draw round the centre circle, cut this out. You can then draw an icing shape round the edge of the circle and cut out. You now have your icing template.
Cut out your icing from felt using your template. Once cut out you can decorate your icing with sprinkles by sewing on coloured beads or small pieces of felt.
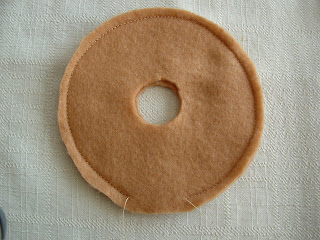
To make the dougnut cut out 2 squares of felt slightly bigger then the template. Pin the doughnut template onto the 2 squares of felt. Either machine stitch or hand stitch round the edge of the outside of the template leaving a gap of about 2 to 2.5cm for turning. While the template is still pinned onto the felt carefully cut out the small inner circle. Take off the template and trim round the edge of the outer sewn edge leaving about 0.5cm. To make an even neater finish carefully make small snips round the circle being careful not to snip the stitches (yes i've done this a few times)Carefully turn inside out through the small gap.
Sew small blanket stitches round the small innner circle. See my tutorial for blanket stitch http://lisajhoney.blogspot.co.uk/2010/02/tutorial-for-blanket-stitch.html
Carefully and with small pieces of stuffing at a time fill the doughnut. I find a chopstick helps to get into some areas. When full, sew the final outer edge piece closed with the ladder stitch which gives a neat finish.
You can now add the frosting to the doughnut. Place the icing over the doughnut and carefully sew the inner circle of the icing to the inner circle of the doughnut. When finished you can sew the outer edge of the icing onto the doughnut using blanket stitch which gives a neat finish.
Here are a few dougnuts I have made some smaller and some plain doughnuts without the centre hole.


4 comments:
These are so gorgeous! I love them and I know my kids would, too! :) Lisa
How can you manage to turn the felt inside out? Every time I try, it wrinkles a lot ...
Lovely! Thanks!
Very cute! Why not just turn through the center hole though, instead of leaving a gap?
Post a Comment